
Last autumn, I walked through a rental property in Queanbeyan and found ceiling stains in two bedrooms, a bathroom fan ducted straight into the roof cavity, and flexible braided hoses that had not been checked in eight years.
The owner did not know any of it was there. Three months later, one hose burst, the insurance claim climbed above $27,000, and the tenants moved out.
Every problem on that list was preventable with a focused weekend, a short shopping list, and one or two well-timed trade bookings. That is what smart maintenance upgrades really do.
They do not just tidy a house. They protect the building, reduce running costs, and make rooms feel better straight away, especially after you stop draughts or fix damp air.
Australian homes tend to lose value through the same failures again and again, roof leaks, air leakage, inefficient hot water, and hidden moisture. QBE data shows water damage makes up roughly 24% of home insurance claims, with average costs around $5,000 and severe cases far above that.
If you treat your home like a working asset, start with the upgrades that prevent those failures first. The gains build on each other, and the savings usually start sooner than owners expect.
What Counts as a Maintenance Upgrade
A maintenance upgrade closes a performance gap instead of just covering a cosmetic issue.
A repair fixes what has already failed. An upgrade reduces the chance of the next failure, lowers a utility bill, or brings the home closer to current standards. Replacing one cracked tile is a repair. Sealing every external door and window is an upgrade because it changes how the home performs every day.
Useful examples include exhaust fans ducted to outdoor air instead of the roof space, WELS-rated showerheads and dual-flush toilets, heat-pump hot water systems, gutter protection in bushfire-prone areas, and faster-drying bathroom surfaces. Each one targets a known risk with a clear purpose.
Quick Wins You Can Do This Weekend
Two to four hours of simple work can make the house safer, drier, and easier to heat by Monday.
- Fit adhesive door sweeps and foam window seals to every external opening. Draught-proofing is one of the cheapest winter upgrades and can cut heating loss sharply.
- Replace split or mouldy bathroom silicone, then use a squeegee after each shower so water leaves the room faster.
- Clear external drains and flush reachable gutters so stormwater can move freely.
- Test each residual current device, or RCD, at the switchboard and press the smoke-alarm test button in every room.
- Swap old showerheads for 4-star or better WELS models to reduce water use without hurting comfort.
- Create a two-mat entry system, coir outside and washable mat inside, to keep grit and rainwater off finished floors.
Seal the Envelope First
Air leakage is one of the fastest ways to waste money and make a home feel uncomfortable.
Heating and cooling account for around 40% of household energy use in Australia, and every extra degree of heating or cooling can lift that figure by 5% to 10%. In older homes, the biggest losses usually happen around door frames, window sashes, downlights, exhaust penetrations, and unused chimneys.
Check for leaks on a cool morning with an incense stick or your hand. Seal fixed gaps with caulk or silicone. Use compressible seals on moving joints and fit draft stoppers at the base of external doors. If the fireplace is decorative only, a removable chimney balloon can pay for itself quickly.
Insulation matters just as much. Top up ceiling batts where they have thinned or shifted, keep clearances around downlights to code, and never crush batts under storage. On windows, lined curtains and pelmets can improve comfort even when full glazing upgrades are not in the budget.
- No visible daylight around closed external doors.
- Stable room temperatures, even on windy days.
- Exhaust fans sealed against back-draft and ducted outdoors.
- Attic hatches sealed and insulated on top.
- Ceiling insulation sitting at full loft, not flattened.
Weather-Ready Roofs and Gutters
Small roof defects can become expensive internal damage after a single storm.
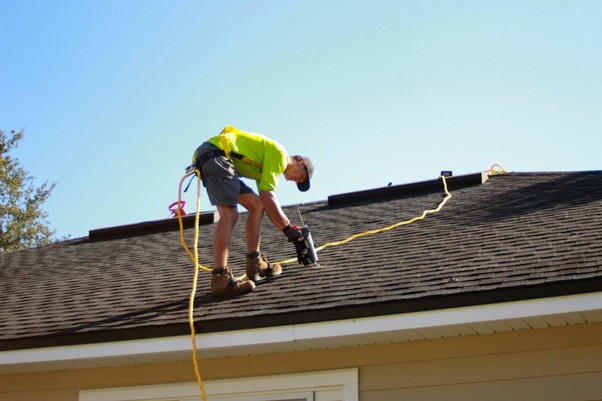
Cracked ridge mortar, loose flashing, blocked valleys, and rusted fixings all let water travel into places you cannot see from inside the house. The ceiling stain that appears in a bedroom is rarely the point where water entered, so Canberra homeowners who see stains after frost or a southerly storm can book expert roof repairs in Canberra for local diagnostics and same-week leak remediation.
Do a binocular check from ground level each autumn and after major wind or hail. Look for slipped tiles, lifted metal laps, blocked gutters, sagging downpipes, and leaf build-up in valleys. In NSW and the ACT, gutter cleaning also supports bushfire preparation because dry leaf litter increases ember risk at the roof edge.
Check that downpipes discharge away from footings, box gutters have overflow relief, and penetrations around vents or flues are not splitting. If you find damp insulation, mouldy smells in the roof space, or repeat ceiling marks after rain, stop treating it like a cosmetic issue.
Know When to Call for Roof Work
Roof leaks need fast diagnosis because water damage spreads well beyond the first stain you can see.
Canberra roofs work hard through frost, strong winds, and summer storm cells. Freeze-thaw cycles can crack mortar, move flashing, and open fine gaps that only show up under the right wind direction. When a leak returns after a patch job, local experience matters, especially for older tile roofs and complex valleys. Homeowners dealing with repeated drips or post-storm damage can arrange roof repairs and maintenance through Lucid Plumbing & Roofing when the issue has moved beyond safe DIY checks.
Act early if staining appears after a frost event or a southerly storm. Delays let moisture soak insulation, ceiling linings, and timber framing, which increases both drying time and repair cost.
Before a technician arrives, photograph stains with a date stamp, note which rooms are affected, write down recent weather events, and confirm access points to the roof space. That short record helps a crew bring the right materials for tile, metal, flashing, or gutter repairs on the first visit.
Moisture, Mould and Healthy Air Indoors
Control moisture at the source first, then move it outside before it settles into ceilings, walls, and floors.
Under the condensation management rules in NCC 2022, exhaust air from bathrooms, toilets, kitchens, and laundries should discharge to outdoor air, not into the roof space. If a fan dumps warm, wet air into the ceiling cavity, it can wet insulation, feed mould growth, and stain plaster long before you notice a smell indoors.
Run bathroom fans during showers and for 10 to 20 minutes after. A door undercut of about 10 to 20 mm helps supply make-up air so the fan can actually move moisture. If mirrors stay fogged for half an hour or paint starts peeling above the shower, the room is telling you the ventilation is not working well enough.
Keep an inexpensive hygrometer in bathrooms, laundries, and any room with poor winter sun. Relative humidity that sits above 60% for long periods supports mould growth, especially on silicone, grout lines, wardrobes on external walls, and the back of furniture pushed tight against plasterboard.
Also check under vanities, around toilet pan seals, and beneath sinks for slow leaks. A drip that never reaches the hallway can still swell joinery, soften skirting, and leave a musty smell that buyers notice straight away during inspections.
Falls remain the leading cause of injury hospitalisations in Australia. Ventilation helps by drying the room faster, but the surface underfoot matters too, especially in bathrooms used by children, older adults, or anyone stepping onto smooth tile with wet feet.
Once fans are venting outdoors and hidden drips are under control, the next gain usually comes from the surfaces that stay wet after each shower. That is where bathroom safety and moisture control start to overlap in everyday use.
Choose Bathroom Surfaces That Dry Fast
Bathroom safety improves when water leaves the floor quickly instead of sitting in fabric and grout lines for hours.
Traditional fabric mats can stay damp long after a shower ends. That moisture can sit against tile, trap lint and skin cells, and create the stale smell many owners assume comes from the drain. If you already run the fan properly and still find wet patches around the vanity, a quick-dry, easy-clean surface can help, and you can shop stone bath mat online for an easy swap.
A denser, fast-drying surface shortens the time water stays underfoot and reduces the chance of mould forming beneath the mat. If you want a lower-maintenance option, compare quick-dry stone bath mat options from Natureva Home and choose a size that catches water at the shower exit without blocking the door swing.
Whichever style you use, keep the floor clean underneath it. Rinse the mat as needed, let it dry fully, and do not let any bathroom mat become a permanent damp layer on the tile.
Use Water Wisely
Efficient fixtures and simple leak checks cut bills and reduce the risk of major internal water damage.
Upgrading taps, toilets, and showerheads starts paying back quickly. A 4-star dual-flush toilet can save around 50 kilolitres of water and about $148 per year. Basin mixers with low-flow aerators can reduce water use further without changing how the room feels day to day.
Run a leak audit every quarter. Do a no-use water-meter check, place dye tablets in toilet cisterns, and inspect every flexible braided hose under sinks, basins, and laundries. Suncorp reports that these hoses are a leading cause of major water damage, with average flexi-hose claims exceeding $27,500.
If pressure exceeds 500 kPa, ask a plumber about a pressure-limiting valve. Pair that with clearly accessible isolation valves so anyone in the house can shut off water fast during a failure.
Plan the Hot-Water Upgrade Path
Hot-water systems are easier and cheaper to replace when you plan before the tank fails.
Hot water makes up about 25% of household energy use in Australia, and conventional electric storage units are usually the most expensive type to run. Heat-pump hot water systems commonly use about 60% to 75% less electricity than standard electric storage heaters.
The upfront price is higher, but emergency replacement after a tank failure is usually worse. Size the unit to household demand, check noise ratings, think about location near bedrooms, and match performance to your climate zone. If you have solar PV, time the system to run during midday generation.
Plan replacement around years 10 to 12 of the current system. Pre-quote any electrical work so you are not forced into a rushed decision on the day the old unit dies.
Check Safety, Compliance and Insurance Basics
Small compliance gaps can become big problems after a fire, flood, or tenant injury claim.
Test RCDs twice a year, label the switchboard clearly, and confirm smoke alarms meet your state requirements. Queensland, for example, is moving to interconnected photoelectric alarms compliant with AS 3786:2014 by 1 January 2027, and other states are tightening rules as well.
Verify that pool and spa barrier gates self-close and self-latch. Keep dated photos, invoices, and service reports for every maintenance task because insurers may ask for proof of reasonable upkeep when assessing a claim.
Follow a Seasonal Maintenance Roadmap
Grouping jobs by season makes maintenance easier to manage and usually lowers trade callout costs.
- Autumn: Clean gutters and valleys, scan the roof, trim overhanging branches, and prepare for ember season.
- Winter: Seal draughts, top up insulation, test smoke alarms, and check heating filters.
- Spring: Inspect bathroom ventilation, renew silicone, look for damp marks, and adjust sticking doors or locks.
- Summer: Touch up exterior paint and caulk, review shading, check irrigation leaks, and confirm downpipes can handle storm flow.
Review a Budget and ROI Snapshot
Put money first into upgrades that either reduce a known failure risk or produce a measurable saving within the next year.
| Upgrade | Typical Cost | Annual Benefit |
|---|---|---|
| Draught-proofing | $150–$400 | Up to 25% heating-bill reduction |
| Heat-pump hot water | $3,000–$5,500 | 60–75% less electricity vs electric storage |
| WELS toilet and showerhead | $300–$800 | ~50 kL water saved, ~$148/year |
| Roof and gutter maintenance | $200–$600 | Avoids $5,000+ water-damage claims |
| Bathroom safety upgrades | $50–$250 | Reduced slip-and-fall risk |
Make Maintenance Work for You
The best upgrades are the ones that stop predictable failures before they disrupt your budget, your comfort, or your next insurance claim.
Set aside one weekend each quarter and give the work an order. Start with the envelope, move to drainage and roof checks, fix moisture and ventilation, then tackle fixtures and hot water. That sequence protects the home first and improves efficiency as you go.
Keep a photo log, store invoices in one folder, and review the seasonal checklist every three months. Over a year, that routine closes the gaps that quietly erode value and turns maintenance from a reactive cost into a controlled plan.